These posts are taken from my blog when I first started writing children’s books. Although the blog is no longer active, I have archived these posts for anyone who is interested in how it all began! Keep reading to see how I published my first book – My Nan is a Ninja.
Introduction
I guess the first thing to do when writing a blog is to introduce yourself. I can only presume that’s right – I’ve never written a blog before and I’ve never followed any either, so I wouldn’t really know to be honest. Here we go then –
Hi, I’m Tom Plum.
As you can imagine, this is my pseudonym. Although, Tom is in fact my real first name. Plum however is actually my wife’s maiden name. Although she used to spell it with a ‘be’ on the end (Plumbe). I decided to drop the ‘be’ though, as people sometimes get confused and pronounce it ‘plum-bee’.
This might seem rather uncreative of me, but I played with some other names and they all felt forced and unnatural. I decided instead to go with my first instinct. ‘Tom Plum’ has a nice ring it to it – it’s a friendly, jolly kind of name, and in my mind is perfect for writing children’s books.
Which is what this blog is all about!
I am an aspiring author beginning my journey into the world of self publishing, and I wanted a way to track my progress and keep myself on target. Each Friday I will give a report of my achievements for the week, and make note of anything interesting I discover along the way. I may from time to time do additional posts, but the weekly report will be the main bulk of the content.
To be honest, this blog is mainly as an incentive for me, rather than for any particular audience. If at a later date my ramblings have some value to other aspiring writers then that’s great, but ultimately this is a quite a selfish blog.
My plan is to set myself a target every week, and record on here how much I have achieved. I will then feel obliged to try and achieve these goals to save face publicly on this blog. Even if no one ever reads this, the hope is that just having this blog will give me the metaphorical rocket-up-the-bum to get on and get it done!
Wish me luck!
Week 1
For my first progress report, I thought it would make sense to go back and cover the steps I have already taken before beginning this blog.
Research
- I have read numerous children’s picture books with my two sons.
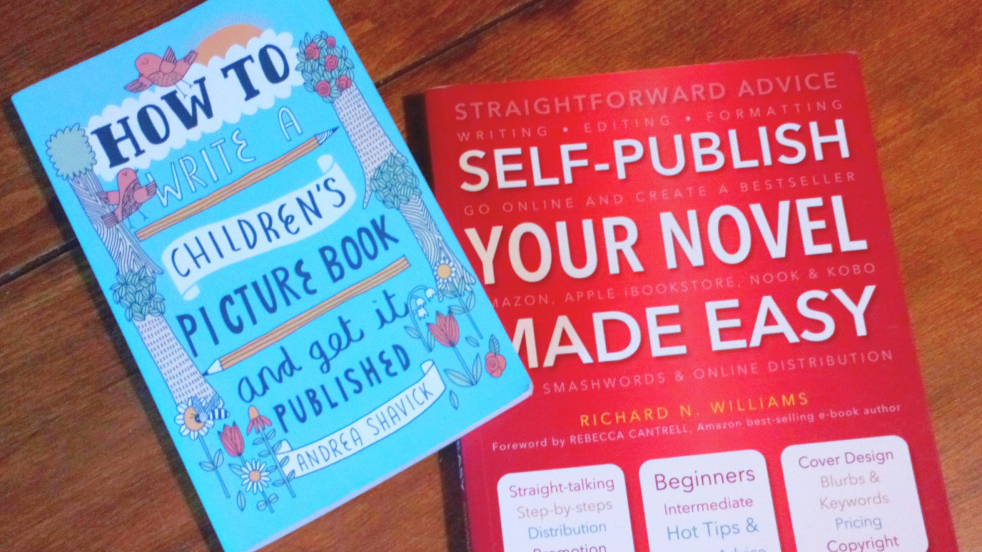
- I have read ‘How to Write a Children’s Picture Book and Get it Published‘ by Andrea Shavick.
- I have read ‘Self-Publish Your Novel Made Easy‘ by Richard N. Williams.
- I have looked at numerous articles on the web about writing children’s books and about self publishing.
- I have listened to a number of YouTubers talk about self publishing.
Development
- I have set up a ‘Tom Plum’ Outlook account, Instagram account and Goodreads account.
- I have partially set up a KDP account.
- I have four books that I have almost finished writing, and various other ideas to develop.
- I have downloaded and played around with Kindle Kids’ Book Creator.
Next Week’s Target
My target will be to finish writing my first book ‘My Nan is a Ninja’, get it fully planned out, and begin sketching out the final page designs.
Week 2
This Week’s Target
‘My target will be to sketch out a substantial amount of final page designs and to test out and choose a rendering style.’
I focused on trying to finalise the style I will be Illustrating my books with this week, but I found I wasn’t happy with anything that I tried.
My original plan was as follows –
- Sketch out the final images in pencil.
- Ink the images using a gel or ink pen, then erase the pencil line.
- Possibly hand paint the images.
- Scan the images, then either paint the final colours using Photoshop, or if already painted then use Photoshop to improve the final result.
The problem was however, I couldn’t get the inked line-work right. I tried a few different styles using a number of different pens but just wasn’t happy with any of the results. Although I’ve used this method previously, it just didn’t work with the art style I imagined for my books.

I browsed online for some inspiration and then after much debate, I decided to use Photoshop for the inking rather than by hand. I feel this gives a cleaner, crisper image, much better suited to the type of books I plan to create.
Due to this creative dilemma, it set me back a bit with completing the final pages, but I did manage to finalise a couple of pages ready to be scanned into Photoshop.
I also discovered an online tool called Pixlr.
Due to a lack of Photoshop at work, I began researching an alternative. I ‘ve previously tried a number of other options such as Gimp and Paint.net, but never really took to them. I found Pixlr, however, has a very effective, simplified interface, that feels like a collection of the most commonly used and useful features from Photoshop.
This is only on the online desktop version mind you – the mobile app is more similar to the Instagram photo editor and doesn’t have any of the advanced features of the online version.
Pixlr is definitely worth a look as a free Photoshop alternative though, and I will continue to use it when I find myself without access to a more premium option.
Next Week’s Target
My target will be to finalise all the pencil work and scan the pages ready for finishing in Photoshop.
Week 3
This Week’s Target
My target will be to finalise all the pencil work and scan the pages ready for finishing in Photoshop.
I only managed to get about half of the pencil work done this week, so I think I may have aimed a bit high again. I did ink all the finished pages though, which I hadn’t planned for last week.
The inking might not have been necessary, as I’m going to have to re-ink them digitally anyway, but the final line-work is clearer so this should be an advantage in Photoshop later. Maybe I’ll time myself when I ink and see if it would be worth cutting it from the creative process.

As my rate of production has been a bit hit and miss, I decided to plan out a new monthly schedule, with a target for each day, rather than a general target for each week. My long-term goal is to be able to produce one book a month, within the time constraints of having a full-time job and a young family. With this in mind, I worked out what I would need to complete each day to achieve this based on a 28-day cycle. The schedule is as follows:
28 Day Book Production Schedule
- Write book idea.
- Finalise story.
- Finalise story.
- Plan out pages.
- Design characters.
- Design characters.
- Design characters.
- Draw pages 1-3.
- Draw pages 4-6.
- Draw pages 7-9.
- Draw pages 10-12.
- Draw pages 13-15.
- Draw pages 16-18.
- Draw pages 19-21.
- Draw pages 21-24.
- Colour pages 1-3.
- Colour pages 4-6.
- Colour pages 7-9.
- Colour pages 10-12.
- Colour pages 13-15.
- Colour pages 16-18.
- Colour pages 19-21.
- Colour pages 21-24.
- Design front cover + extras.
- Colour front cover + extras.
- Create Kindle book.
- Create Kindle book.
- Publish book.
Whether it will be possible to keep to this is up for debate, but I will try my best to stick to the plan!
I also looked into using Adobe Illustrator this week as an alternative to Photoshop, to see if it would offer any advantages to my workflow. After a bit of researching online and questioning a friend who uses it, I think it could be the better application; however, it would mean learning from scratch how to use a new tool which would set me back significantly. I might set that as a goal for the future.
Next Week’s Targets
To try and follow my new monthly schedule! All going well I should have completed all the line drawings and should have started colouring some pages.
Week 4
So last week I began my new daily, task-based schedule…
Some days I kept to it and managed to easily achieve the set goal for that day, other days it just didn’t happen. I won’t make excuses, some days I just looked at the sketchbook and thought – no. I am a bit disappointed in myself, but I realised that although I didn’t stick fully to the set tasks, it did give me the incentive to try and achieve something each day. I’m still going to stick to the schedule as close as I can as I want to be able to create books in the shortest time possible, however, if it doesn’t happen every day then I’ll just try and make it up later.
So as it stands I’ve very nearly finished all the line work and inking for My Nan Is A Ninja, I’ve just got a couple of pages left and then I will finally begin photoshopping. Which I’m actually very excited about.

Also, during a bit of research this week I found an excellent site called Kindlepreneur.
Dave Chesson who runs the site offers a lot of really good free info for newbies to the KPD game so I highly recommend you take a look. He also has a really cool analysis tool on there that I’m very tempted to buy in the future. I’ll add it to the ‘things-I’m-going-to-buy-with-the-earnings-from-my-book-sales’ list!
I’m also no longer going to have a ‘next week’s target’ section as my overall target will be to stick to the schedule! Instead, I’ll just give a rundown of what I’ve learned and achieved, which will hopefully be a respectable amount each week.
Week 5
The linework is finally done!
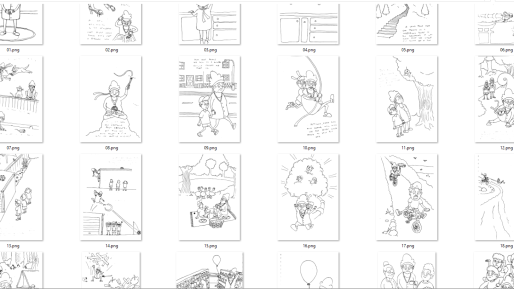
I was pretty loose with the schedule this week, but I managed to finish all the main drawings for the book, inked them all and scanned them ready for Photoshop.
Also, I decided to give Illustrator another shot, and although I won’t be using it to finalise the artwork quite yet, I did use one of its very clever features called ‘Image Trace’.
Image Trace does as the name implies – it traces over the scanned image and replaces all the linework with a clean, bold vectorised line. Although not 100% perfect, the results are pretty impressive and will save me hours and hours of retracing by hand in Photoshop.
Using Image Trace In Illustrator
For anyone interested in the process I used, it goes as follows –
- Create a new document in Illustrator. (I used the A4 template as my scanned images are A4 in size).
- File, Place – then select your scanned image.
- Position the image in the workspace.
- Object, Crop Image – to clean up the edges.
- Object, Rasterize – Set to grayscale and 300 DPI. This prepares it ready for image tracing.
- Object, Image Trace, Make – In the Image Trace window adjust the threshold to suit, and click trace.
- File, Export, Export As – Choose your prefered file type and you’re done!
Competent users would then continue to edit their work within Illustrator, however, due to my inexperience, I have chosen to export my pages and continue editing them using Photoshop.
Unfortunately, I had a bit of a disaster when it came to colouring the pages – my Wacom tablet wouldn’t work! Initially, I thought it was completely broken but I brought it to work today and it functions well enough on my work PC, although one button on the pen is definitely defunct now. Hopefully, it’s just a driver or settings issue on my laptop at home, so fingers crossed I can begin colouring this weekend!
Week 6
Colouring underway…
After resolving the problem with my Wacom tablet last week, I was finally able to begin colouring this week. I did a number of colour tests and played with some different colouring styles. After quite a bit of experimentation, I think I’m happy to proceed with finishing the pages. I’ve done a couple, I just need to crack on and get it finished now.
 I have also begun selecting the best bits from the Kindlepreneur website and other sites, and have started making my own personal KDP guidebook. Having all that key information in one place is a lot easier when it comes to actually using it, rather than flicking between multiple pages on multiple websites.
So it seems the end is in sight! Hopefully, my first book will be on Amazon in the not-too-distant-future!
Week 7
Okay, so it turns out colouring takes a long time…

Firstly I’d just like to bring attention to the amazing picture of Ninja Nan that my little boy Zachary drew. Zachary loves drawing with me and this week when I was working on ‘My Nan is a Ninja’ he surprised me with his own drawing of her! My first ever fan art!
So, this week I’ve been gradually getting through all my pages adding colour, but it really does take a long time. I’ve been putting 2 or 3 hours in most nights, but the amount achieved in each session is not nearly as much as I’d anticipated. Thank goodness I found the Illustrator technique to save myself re-inking every outline, or I’d be doubting whether the book would ever be finished!
I did find another technique to speed up colouring in Photoshop though. It’s not the most sophisticated shortcut in the whole world, but I’ve found it’s saved me a fair amount of time when colouring larger areas. I’ve adapted it a little bit to suit, but it goes as follows.
- Choose an area of single colour that you want to fill.
- Colour around the perimeter of this area, making sure the line is a closed loop when finished.
- Select the area inside this loop with the Magic Wand Tool.
- Next, create a new action and begin recording.
- Extend the selection by 2 pixels.
- Use Control + Backspace to fill the selected area.
- Use Control + Backspace to fill the selected area a second time.
(I find doing it only once leaves me with a faint white border line that doesn’t fill, whereas the second time will remove this). - Stop recording.
- Set the shortcut for the action to an F key of your choice.
(I chose F5 as it was the only one which didn’t have an additional function attached). - From here just repeat steps 1 – 3 on each area to be coloured, followed by pressing your chosen F key while highlighting inside the selected area.
Anyway, I’ll keep grinding on and hopefully will be almost finished colouring this time next week… #famouslastwords
Week 8
I’ve changed the name!
So, as you may or may not have noticed, I’ve changed the naming format of my weekly reports – instead of ‘Progress Report – Week X’ it’s now ‘My First Book – Week X’. I did this because I realised that once I’ve completed ‘My Nan is a Ninja’ (my first book), and begin working on my second/third/fourth book, it’s going to be much of the same again ad infinitum. I also thought it sounded more interesting than just ‘progress report’.
I’ve decided instead to continue the weekly posts up until ‘My Nan is a Ninja’ has been published, and then revert to a monthly progress report. This way I can still record my progress, without retreading the same ground too much. I’ll also begin writing book reviews of some of my favourite books and possibly start posting useful tips that I’ve learnt along the way.
This week I also created a separate author webpage as I plan to keep this blog as a unique entity going forward. This blog will be home to my journal, reviews, and general musings, and my author page will only feature my finished books and all the official author stuff.
It’s still a work-a-progress, but feel free to take a look –
tomplumbooks.wordpress.com
So, My Nan is a Ninja has progressed steadily in the colouring department. As per usual I think I overshot the mark on how much could be achieved, but I feel I’ve made a substantial dent in the workload. It’s just taking too long! I want to compile it now and see what it looks like on a Kindle!
Week 9
Why won’t you work, MailChimp?!
If anyone knows how to get MailChimp to work on a WordPress.com website any tips would be greatly received! I’ll get to that in a bit though…
This week I’ve been gradually ploughing through the colouring, working on the book most nights still. Last night I worked on one page for an hour and a half and it’s still not done… My wife did remind me that creating a children’s book does take a long time (she has a degree in illustration and created a children’s book for her final piece), but it’s so annoying! If I could work on it full-time it would be done in a week! Hopefully, one day that will be a reality, until then though its twilight hours only.
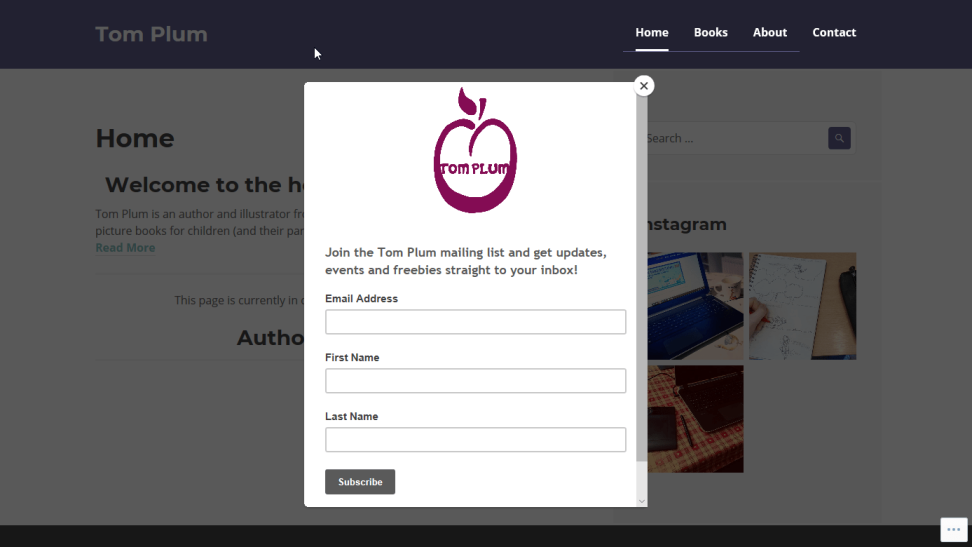
I’ve also been working on my author website a lot this week. I’ve updated the About Me section numerous times, added Instagram integration, and attempted to add a MailChimp sign up form. I’ve managed to add a pop-up form that appears when you first visit the website, however, I also want to have embedded forms permanently in place on the page. I can’t for the life of me get it to work though! I’ve researched it and researched it but can’t find a way around it other than using plugins, which you need a business account for. Such a pain! I’ll keep trying though, where there’s a will there’s a way!
Week 10
Social media ready to go!
This week I set up a Tom Plum facebook page and a Tom Plum twitter account, so those plus my Instagram page means my social media is all set up and ready to go! There’s nothing on there yet, but at least they’re ready.
I did begin recording video close-ups of me sketching out Ninja Nan to post on social media, but after multiple failed attempts I decided to try again another time. I think the pressure of being recorded seemed to block the creative juices and the sketches were a bit rubbish really.
I did, however, resolve the form issue from last week. After hours of research, I was about to give up when I found a method using forms created on a platform called JotForm. It’s a roundabout method as you have to create a new form in JotForm, embed that in your site, and then link that to your MailChimp list. It’s not the simplest method but it works, so that’s the main thing!
I also had a discussion with my web designer friend and he recommended instead of using the WordPress.com platform, to instead pay for separate hosting and using the WordPress.org platform. When I first set this blog up I didn’t even realise that two platforms existed – turns out there’s a big difference between them though! It seems WordPress.com is more of a beginner tool with limited options, whereas WordPress.org is more of an Intermediate tool which requires more skill but gives you much more options. So at some point, I will be switching over!
The page colouring for my book is steadily progressing, however, I didn’t work on it quite so much this week so there’s still a fair amount to go. I’m chipping away at it though, so one day soon I’ll finally be able to say ‘the colouring’s all done!’
Week 11
A week off…
Had a week off this week and was away visiting family so not a lot to report I’m afraid this week. I did manage to get a reasonable amount of colouring done while I was away though, so should hopefully move on to the shading and highlighting fairly soon.
Now that a fair few pages are finished (in terms of colouring) the book is really starting to come alive, and I’m really excited to see it compiled and printed.
A problem that I’ve been addressing this week, is when I was designing the book I seem to have forgotten to make room for the text on a number of pages. An amateur mistake I know, especially as some pages I had considered the text and others I completely forgot. I guess I got carried away with the drawing and focused too much on creating an interesting image and forgot all about where the text would go. And I’m now having to fix this in Photoshop, at the cost of the composition in some cases too, unfortunately. I’ll remember for book number two though!
Every mistake is a lesson learnt, and every error is an opportunity for growth.
Week 12
Colouring? What colouring?!

Just a very short post this week as I have only one thing to say – the colouring is done! After many late nights of Photoshop, the colouring is finally complete! I finished it this evening, hence the very late post (11pm GMT). Admittedly there is still some tweaking to do, but generally speaking, all pages have now been finished. Next up shading and highlighting!
Week 13
No shading required.
So this week I had planned to work on the shading and highlighting on my illustrations. After experimenting with a few different styles I realised that it didn’t add anything to the images and actually seemed unnecessary. I hummed and hawed about this decision as I was worried the illustrations would look incomplete, but after numerous attempts, I found that the images just looked better without. Which is great, because it will save me a lot of time!
So all that’s left to do now is refine the line work in places, correct a few mistakes, and then the story pages will be complete. I’ve started working on the front cover, and I’ll need to create some illustrations to accompany the ‘from the author’ page, and the inside title page, etc. After that, I’ll be all done! I’m reluctant to put a timeline on it, but I think I’ll be ready to publish by the end of the month!
I also ordered my web hosting this week with a company called OVH, as recommended by my web designer friend. It’s only £2 a month and I now have a custom domain name – tomplumbooks.co.uk
It’s all coming together slowly but surely!
Week 14
Tying up loose ends…
This week I had a good think about everything I need to do ready for publishing My Nan is a Ninja and began making a final checklist. Turns out there was still quite a few things to round up!
I still needed to finish setting up my KDP account. For those who don’t know, you are required to enter an IBAN and BIC number when setting your bank details. I had no idea what these were, but it turns out they’re basically the international version of a UK account number and sort code. After an hour of frustration trying to get my online banking to work I managed to find hidden in the settings my IBAN and BIC number and got my KDP all up to date.
I also set up a more professional sounding e-mail address – tom@tomplumbooks.co.uk
I’ve been working on my front cover and correcting some mistakes on the illustrations this week too, although until I try adding the words I’ve got no idea how many more adjustments I’ll need to make (hopefully not too many)!
I’ve also been going back over my notes that I gathered, mainly from Kindlepreneur, making sure I’ve not missed anything and I’ve started thinking more about my keywords, subtitle and book description.
So, there’s still quite a few loose ends to tie up, but I’m ticking them off one at a time, each tick a step closer to the finished product!
Week 15
The Finishing Touches
My Nan is a Ninja is almost complete. Almost.
I had planned to publish it this week ready for this Friday post, however, I wanted to be absolutely certain I haven’t missed anything. I’m going to go over everything again this weekend with the intention of publishing by Sunday.
I did some more tying up loose ends this week – I finished the front cover and ‘from the author’ pages, I did some final tweaking to the illustrations, and I made further adjustments to my website. I also wrote my book description and chose the all-important keywords – let’s hope they’re good ones!
All that’s left to do now is to finalise the layout in Kindle Kids’ Book Creator and arrange a few promotions using my long list of promotional websites (courtesy of Kindlepreneur)!
Next week I’ll get an Amazon promotion in place on Friday, so as a thank you to all my subscribers you’ll be able to download it for free! One more week people!
Week 16
Today Tomorrow Sunday is the big day!
So, I had planned on publishing ready for a promotion today – turns out I had a lot more tweaking and finalising than I realised! I’ve only just managed to compile the book yesterday and this evening I’ll make the final edits.
I admittedly feel quite anxious about publishing as I don’t want to have missed anything, or find out there’s a mistake after the book’s published. I wonder if that’s what all new authors feel? I guess nothing can be perfect and eventually you have to draw a line under it and just get it out there.
I also realised this week that I’d missed a crucial point when designing the pages – I hadn’t accounted for the Kindle aspect ratio. As I started to load my images into Kindle Kids Book Creator I was surprised by how my pages all seemed to fit perfectly, despite not paying any heed to resolution or image size. I’d expected maybe a tool to resize the images in the software, to make the images fit the standard Kindle aspect ratio, but there was none. It seemed all too convenient – something wasn’t right.
A quick Google search and I found another author – Chip Street, who’d had the exact same problem. Turns out that despite appearances, the Book Creator software doesn’t auto-resize images and instead adds in scrollbars when needed – not what anyone wants!
Following Chip’s guidelines, I resized all my pages to the Kindle 5:8 aspect ratio, adding a bit of extra image on at the top and bottom. This actually improved the composition as it then meant I had more room to fit the text in, which is a problem I realised I might have earlier in the development process. So thanks Chip!
All going well I’ll publish tonight and set the free promotion for tomorrow. Watch this space!
UPDATE:
So I managed to publish My Nan is a Ninja yesterday as planned, however upon publishing my book, it then went under review which I was told could take up to 72 hours (something I was completely unaware of)!
I found that although the review was completed this morning, I’ve now missed the deadline for running a promotion today. So instead, the promotion will be tomorrow!
See you then!
Published!
Mission Accomplished.
My first book ‘My Nan is a Ninja’ has been completed!
After many months I can now officially call myself an author, not just a writer! (For those who don’t know, to be classed as an author you need to have a published work under your belt).
There was a lot to learn, many new skills to develop, and I managed to misjudge how long tasks would take every step of the way. But I finally made it.
I’ve really enjoyed the entire creative process and I’m proud of what I have achieved. There’s still plenty of room for improvement in all areas, but that’s good, as it means I have room to grow!
From here on out I will only be posting updates on my book progress once a month, as like I’ve mentioned previously, I have a feeling it’s going to be much of the same for each book! I will start my book reviews in two weeks time, and these will be posted every other Friday. Once I’ve got more experience under my belt I will also begin posting my favourite tips and advice once a month.
Thanks again to all my friends, family and subscribers who have been with me on my journey. Here’s to the next book!